3025787 - 7035B14 rear window glass r r includes cleaning of housing
 | Name | Connector |
|---|---|---|
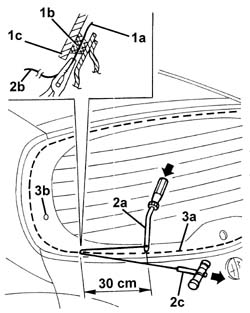
| 2a | Heated rear windscreen | P55A |
| Name | Connector |
|---|---|---|
| 2b | Heated rear windscreen | P55B |


 | Type | Component | Name | Qty. |
|---|---|---|---|---|
| 2 | PUR activator | REARSCREEN HOUSING | - | - |

| Type | Component | Name | Qty. |
|---|---|---|---|---|
| 2 | PUR activator | REAR WINDOW GLASS | - | - |

| Type | Component | Name | Qty. |
|---|---|---|---|---|
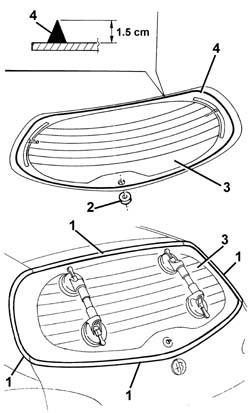
| 4 | Window bonding sealant | REAR WINDOW GLASS | Product n. 71711976 | - |
| Begin applying the sealant from the middle of the lower edge and continue without breaks around the entire edge of the window. |
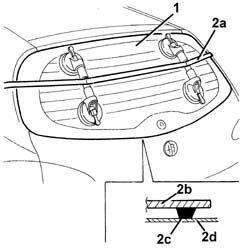
| Do not move the car until the time specified by the sealant manufacturer has elapsed. |