194000228 - 1004D10 POWER UNIT (MANUAL GEARBOX), REMOVED, DISMANTLE AND REASSEMBLE
| Description | Connector | |
|---|---|---|
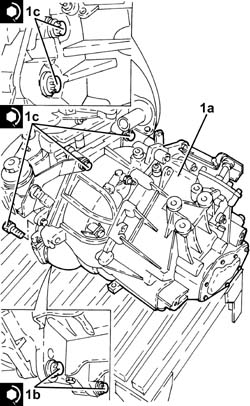
| 1b | Starter motor | See A020 STARTER MOTOR |


| Tool | Description | Function | Validity |
|---|---|---|---|
| 1860846000 | Counter-torque | Flywheel lock |
| Tool | Description | Function | Validity |
|---|---|---|---|
| 1871003100 | Extractor/Fitting tool | Clutch mechanism removal | 2.2 |
| Tool | Description | Function | Validity |
|---|---|---|---|
| 1871003100 | Extractor/Fitting tool | Clutch mechanism removal | 2.2 |

| It is not possible to replace the cltuch plate on its own. Instead the clutch plate/cradle assembly must be replaced. |
| When fitting the clutch plate the correct position is shown by the words "engine side" and "gearbox side". |
| Handle the clutch plate carefully. Do not touch the surfaces of the friction linings with your hands. |
| Clean any anti-corrosion protection or detergents from the friction surface of the clutch tray. |
| Tool | Description | Function | Validity |
|---|---|---|---|
| 1871003100 | Extractor/Fitting tool | Clutch mechanism removal | 2.2 |
| Component | Fastening | dia | Value (daNm) | Validity |
|---|---|---|---|---|
| Clutch drip tray | Bolt | M8 | (engine flywheel side) 2.3 - 2.8 | 2.2 |
| Tool | Description | Function | Validity |
|---|---|---|---|
| 1860846000 | Counter-torque | Flywheel lock |

| Component | Fastening | dia | Value (daNm) | Validity |
|---|---|---|---|---|
| Engine oil sump | Bolt | - | (gearbox side) 4.0 | 2.2 |
| Component | Fastening | dia | Value (daNm) | Validity |
|---|---|---|---|---|
| Manual gearbox | Bolt | M12 | (engine crankcase side) 4.8 - 7.2 | 1.82.2 |
| Component | Fastening | dia | Value (daNm) | Validity |
|---|---|---|---|---|
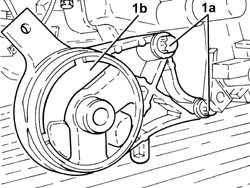
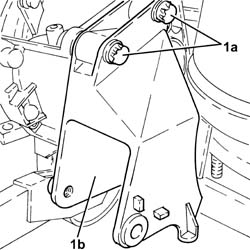
| Bracket on gearbox for lower reaction rod | Bolt | M12 | (gearbox side) 7.5 - 8.5 |

| Component | Fastening | dia | Value (daNm) | Validity |
|---|---|---|---|---|
| Flexible mounting for left side engine support | Bolt | M12 | (gearbox side) 7.5 - 8.5 |

| Component | Fastening | dia | Value (daNm) | Validity |
|---|---|---|---|---|
| Starter motor | Bolt | M10 x 1.5 | (gearbox side) 3.5 - 4.5 | 2.2 |

| Component | Fastening | dia | Value (daNm) | Validity |
|---|---|---|---|---|
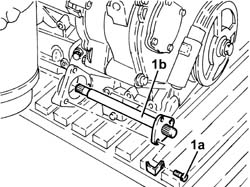
| Intermediate driveshaft | Bolt | M8 | (support side) 2.3 - 2.8 | 2.2 |
