194000995 - 7030B93 FRONT SLIDING ROOF - R R

Removing ( Refitting ) - Turn the ignition key to the OFF position.- Disconnect the negative battery terminal.
DescriptionConnector
BATTERY    See A001 BATTERY
(both)    Op. 7030B41 SLIDING ROOF ASSEMBLY OUTER MOULDING (ONE) - R R    Op. 7030B42 SLIDING ROOF SPOILER - R+R    Op. 7030B49 SLIDING ROOF FRONT ANTI-WIND NOISE GASKET - R R1. Use a Fein vibrating cutter (1a) and Fein 63502103010 cutting blade (1b) to cut the roof panel at points (1c), (1d) and (1e).
1. Use a Fein vibrating cutter (1a) and Fein 194 cutting blade (1b) to cut the sealant at the side (1c) and rear (1d).2. Raise the panel (2a) and, still working from the rear, cut the sealant (2b) and remove the roof.
Refitting ( Removing ) 1. Use adhesive tape to fold the lip of the windscreen seal to free the working area.2. Use an appropriate tool, taking care not to damage the windscreen seal lip, cut and level the sealant strip to leave a thickness between 0.25 and 1 mm in the roof housing compartment on the body.
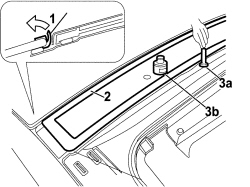
The thickness of the sealant remaining in the front roof housing will act as a support for the new bonding.
Thoroughly clean the roof housing compartment on the body with compressed air and degrease thoroughly with heptane
When bonding, 60 minutes after the bead of sealant has been cut and levelled, the surface of the actual sealant must be treated using the special activating product and it is necessary to wait for 15 minutes before fitting the windscreen to allow the primer thinner to evaporate.
ComponentTypeDescriptionClassificationQty.Validity
Sliding roof fixed transparent housing-Activator for PUR--
Apply the glass adhesion promoter (primer) (3b) to the site of the old sealant strip using the wick (3a) supplied in the Kit.
- Clean the new roof using heptane.- Use a pneumatic gun to extrude a sealant strip to the site of the old strip in the roof housing compartment.
ComponentTypeDescriptionClassificationQty.Validity
Sliding Roof Fixed GlassSealantProduct n° 71711976--
1. Position the roof (1a) and settle in position, inserting 5.1 mm spacers (1b) between the rear lens and the roof.2. With the aid of suckers (2a) and belts (2b), exercise uniform pressure over the entire roof.
Refer to the sealant manufacturer''s instructions for the drying times.
- Remove adhesive tape from the windscreen sealing lip.    Op. 7030B49 SLIDING ROOF FRONT ANTI-WIND NOISE GASKET - R R    Op. 7030B42 SLIDING ROOF SPOILER - R+R(both)    Op. 7030B41 SLIDING ROOF ASSEMBLY OUTER MOULDING (ONE) - R R- Connect the negative battery terminal.
DescriptionConnector
BATTERY    See A001 BATTERY