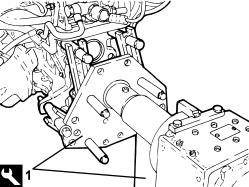
199000403 - 1004D40 ENGINE - POSITION ON STAND AND REMOVE
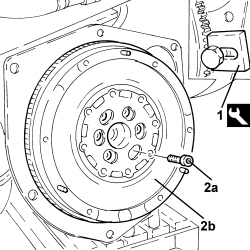
Rest the engine on the stand1. Fit the flywheel lock.| Tool | Description | Function | Validity |
|---|---|---|---|
| 1860846000 | Counter-torque | Flywheel lock |

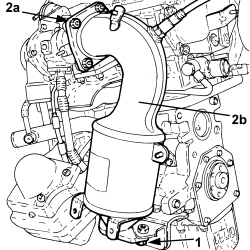
| Description | Connector | |
|---|---|---|
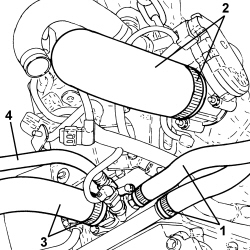
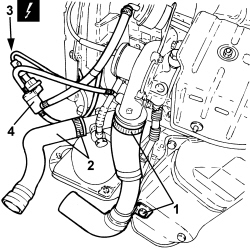
| 3 | Waste gate solenoid valve | See L037 WASTE GATE SOLENOID VALVE |
| Description | Connector | |
|---|---|---|
| 1 | Lambda sensor on pre-catalyzer | See K015 LAMBDA SENSOR ON PRE-CATALYZER |
| Tool | Description | Function | Validity |
|---|---|---|---|
| 1871000000 | Overhaul stand | Engine overhaul |
| Component | Fastening | dia | Value (daNm) | Validity |
|---|---|---|---|---|
| Catalytic converter to turbocharger | Nut | M8 | 2.3 ÷ 2.8 | 1.4 16v TJet |
| Component | Fastening | dia | Value (daNm) | Validity |
|---|---|---|---|---|
| Turbocharger water supply pipe | Connector | M16 | 3.0 ÷ 3.6 | 1.4 16v TJet |
| Tool | Description | Function | Validity |
|---|---|---|---|
| 1860846000 | Counter-torque | Flywheel lock |
| Component | Fastening | dia | Value (daNm) | Validity |
|---|---|---|---|---|
| Engine flywheel | Bolt (to be replaced) | M9 | 1.9 ÷ 2.1 + 50° +/- 2° | 1.4 16v TJet |