199003029 - 7210A02 FRONT END ASSEMBLY - R.R.


| Description | Connector | |
|---|---|---|
| 3a | REAR/CROSSMEMBER COUPLING | See D106 REAR/CROSSMEMBER COUPLING |
| 3b | JUNCTION UNIT | See B001 JUNCTION UNIT |

| Description | Connector | |
|---|---|---|
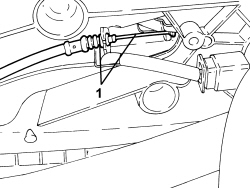
| 1 | LEFT FRONT EARTH | See C010 LEFT FRONT EARTH |

| Description | Connector | |
|---|---|---|
| 1 | LINEAR SENSOR FOR FANS | See K120 LINEAR SENSOR FOR FANS |

| Seal the connectors that have been disconnected using suitable plugs to prevent dampness and impurities from entering the system. |


| Component | Fastening | dia | Value (daNm) | Validity |
|---|---|---|---|---|
| Front end to body | Bolt | M10x1.5x28.5 | 3.2 ÷ 3.8 |

| Component | Fastening | dia | Value (daNm) | Validity |
|---|---|---|---|---|
| Pipe connector on condenser | Bolt | M8 | 1.8 ÷ 2.2 |
